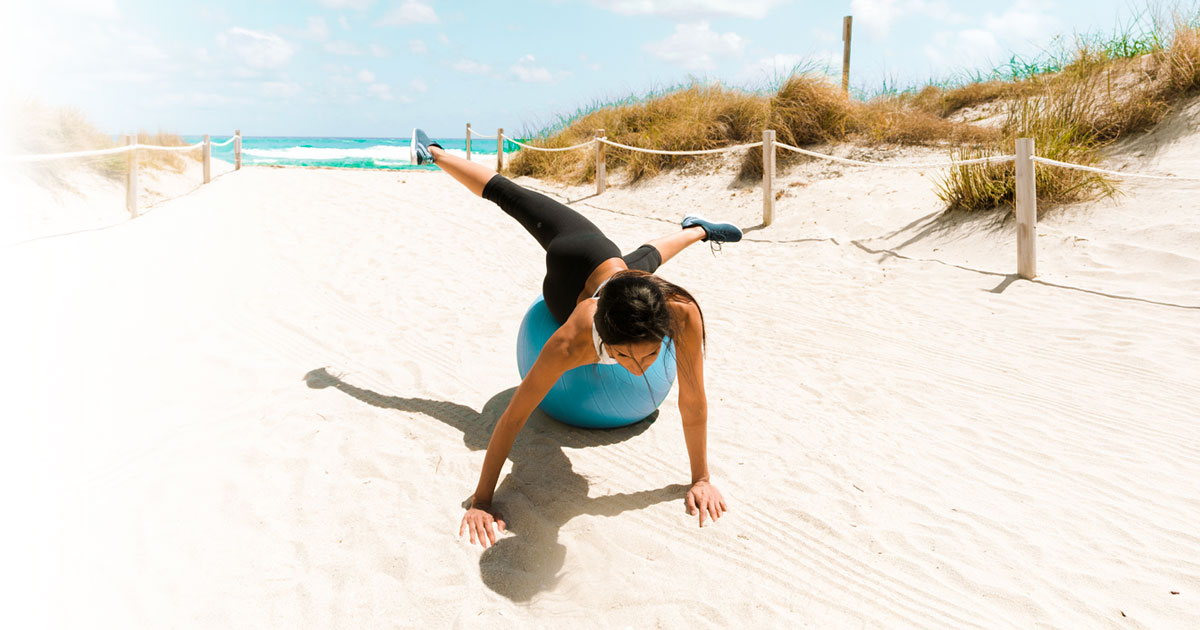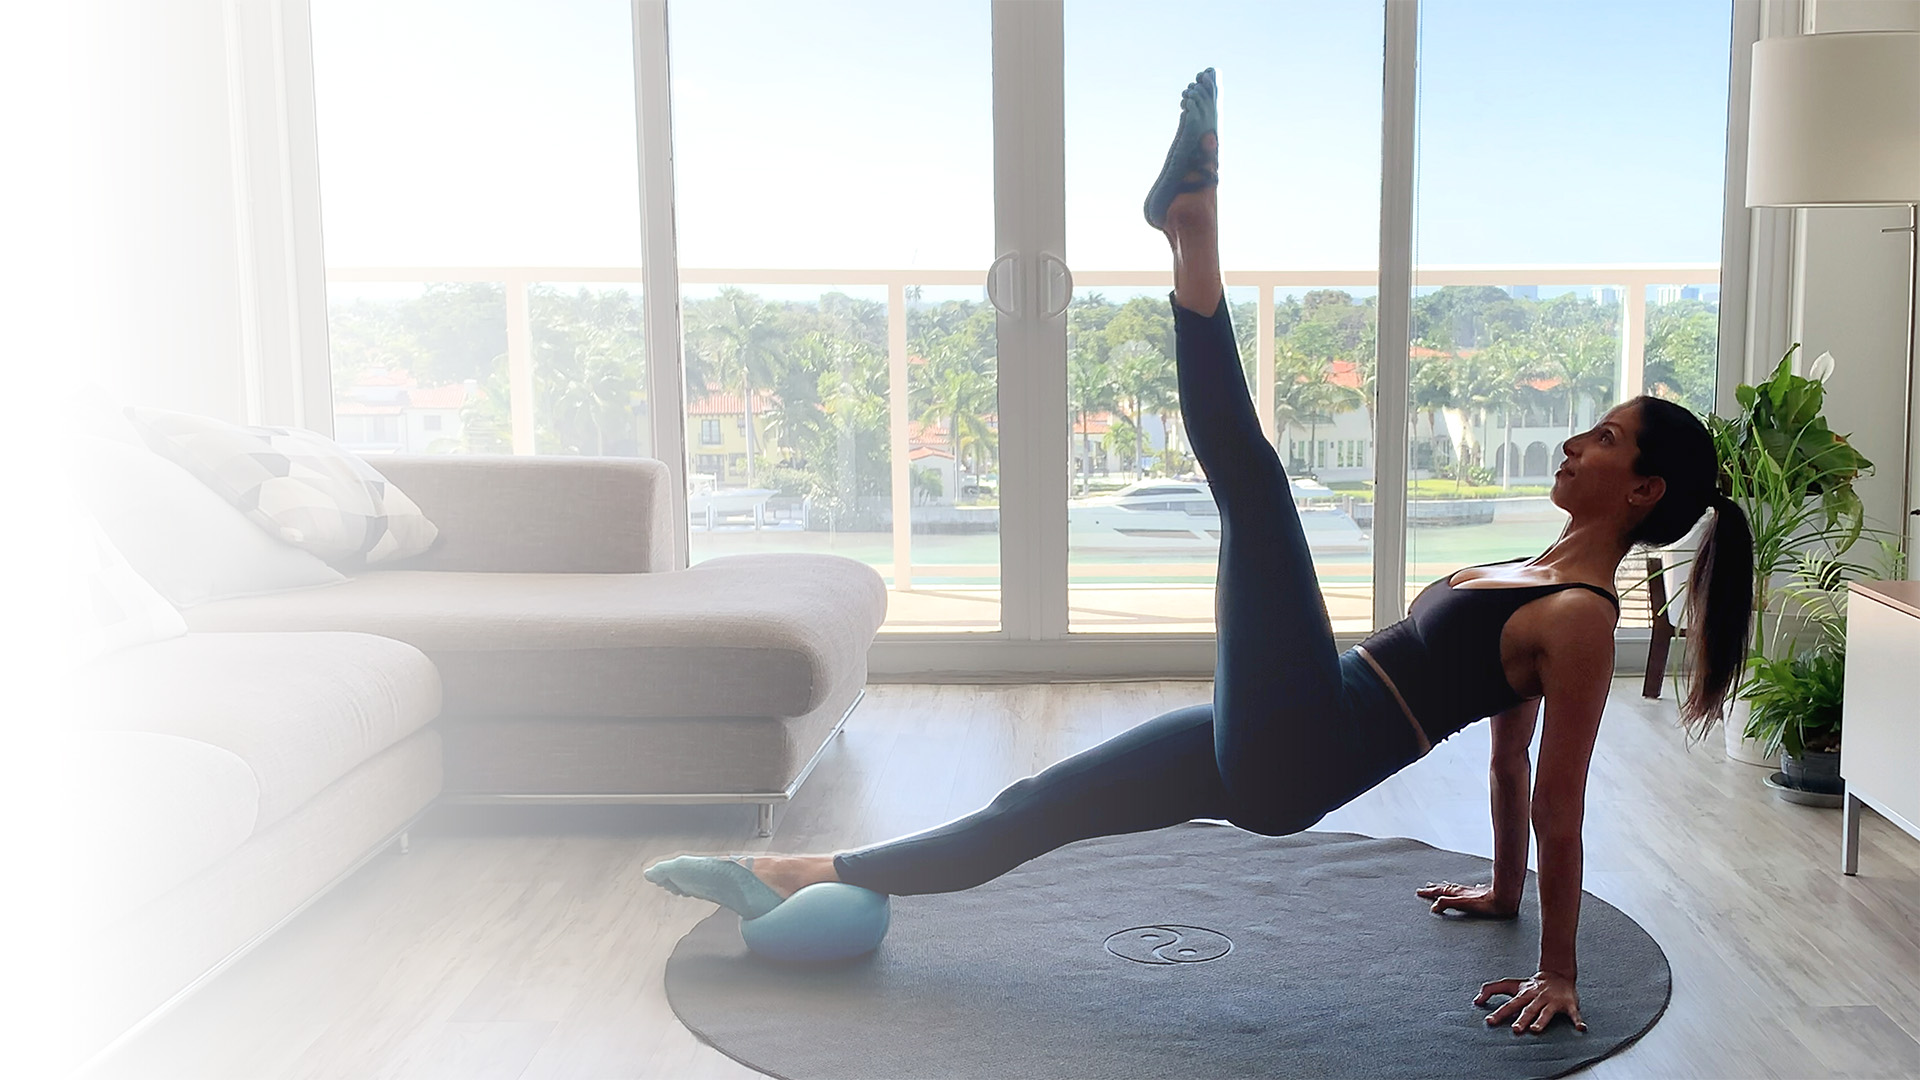
Whoever said “good things come in small packages” must have had this little Pilates ball in mind. Lightweight, affordable, and easy to take anywhere - this small but powerful tool can completely transform your workouts. Adding pilates ball exercises into your routine brings a unique combination of challenge and support, helping you activate deeper muscles, especially through the core.
It’s simple… but it’s not easy 😉
With so many fitness tools out there, it’s easy to feel overwhelmed. But if I had to choose just one to travel with or use in a mat class, the mini Pilates ball would always be my go-to.
It’s versatile, effective, and incredibly fun to work with.
Pilates Small Ball Benefits
The small Pilates ball is a staple in many pilates ball exercises for a reason. It adds variety, intensity, and deeper muscle engagement without complicating your workout.
- Increases core activation and resistance
- Improves balance and stability
- Enhances body awareness (proprioception)
- Supports proper alignment
- Adds both challenge and assistance to movements
Whether you’re practicing mat Pilates or incorporating equipment, the mini ball creates endless variations - especially for core work.
If you’d like to see these movements in action, you can also explore my YouTube workouts, where I guide you step-by-step through effective pilates ball exercises.
Below, you’ll find my favorite pilates ball exercises to help you build strength, stability, and definition — all with one simple tool.
10 Pilates Ball Exercises to Strengthen Your Core
Pilates Ball Exercise #1: Pelvic Tilt
The pelvic tilt is a gentle yet powerful Pilates ball exercise that helps you connect to your deep core, release tension in the lower back, and bring awareness to your pelvic alignment.
Starting Position: Lie on your back with your knees bent and feet flat on the floor, hip-width apart. Place the Pilates ball under your pelvis, supporting the sacrum.
Movement: Gently tilt your pelvis forward and back, creating a small rocking motion.Then explore tilting side to side, keeping the movement slow and controlled.Finally, combine all directions into smooth, circular movements.
Technique & Key Points:
- Inhale as you tilt the pelvis forward. Exhale as you tilt it back.
- Keep your knees aligned with your ankles and pointing upward.
- Avoid letting the knees sway side to side, especially during lateral movements.
- Move with control and focus on deep core activation.
Pilates Ball Exercise #2: Knee Folds
The knee folds exercise challenges your core stability while teaching you to move your legs independently without shifting the pelvis.
Starting Position: Lie on your back with the ball positioned under your sacrum, as in the previous exercise. Lift both legs into a tabletop position, with your knees stacked over your hips at a 90-degree angle and your shins parallel to the floor.
Movement: Lower one leg and gently tap your toes on the floor in front of you, then lift it back up to tabletop.Alternate legs in a slow, controlled rhythm, moving from right to left.Repeat for 10–20 repetitions.
Modification: If maintaining both legs in tabletop feels unstable, keep one foot on the floor and perform the movement with the other leg.Complete 10 repetitions, then switch sides.
Technique & Key Points:
- Keep your pelvis stable on the ball as your leg moves.
- Focus on isolating the movement from the hip joint without tilting the pelvis.
- Move slowly and with control, keeping the core engaged throughout.
Pro Tip: The farther you reach your toes away from the body, the more challenging the exercise becomes for your core.
Pilates Ball Exercise #3: Dead Bug
The dead bug on the Pilates ball is a powerful core stability exercise that challenges coordination, control, and pelvic alignment.
Starting Position: Lie on your back with the ball placed under your sacrum. Lift your legs into a tabletop position, with your knees stacked over your hips and shins parallel to the floor. Rest your arms on the floor alongside your body.
Movement: Extend one leg forward while reaching the opposite arm overhead, moving in opposite directions.Return to the starting position with control, then switch sides.Continue alternating sides for 8–10 repetitions.
Modification: If holding both arms and legs elevated feels unstable, keep the non-moving side grounded.Place one foot flat on the floor and keep the opposite arm resting down.Perform several repetitions on one side, then switch.
Technique & Key Points:
- Keep your pelvis stable on the ball throughout the movement.
- Engage your deep core to prevent arching through the lower back.
- Move slowly and with control, focusing on coordination and balance.
Pilates Ball Exercise #4: Leg Circles
Leg circles on the Pilates ball help improve hip mobility while strengthening the core and challenging pelvic stability.
Starting Position: Lie on your back with the ball placed under your sacrum, as in the previous exercises.Extend one leg straight up toward the ceiling. Keep the other leg bent with the foot flat on the floor.Rest your arms by your sides with palms facing down.
Movement: Draw small, controlled circles on the ceiling with your lifted leg, moving from the hip joint.Complete 5–10 repetitions in one direction, then reverse the circles.Switch legs and repeat on the other side.
Technique & Key Points:
- Keep your pelvis stable on the ball by engaging your core muscles.
- Avoid letting the pelvis move or shift as the leg circles.
- Focus on isolating the movement from the hip of the moving leg.
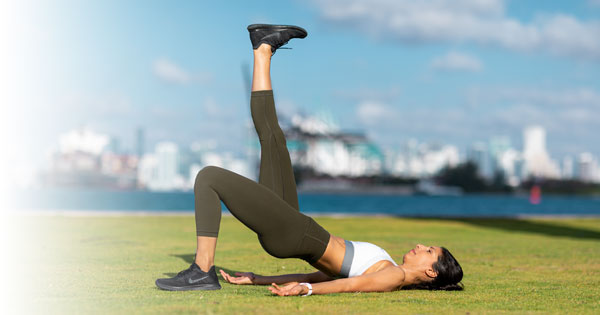
Pilates Ball Exercise #5: Single Leg Bridge
The single leg bridge on the Pilates ball strengthens the glutes and core while challenging balance and pelvic stability.
Starting Position: Lie on your back with your knees bent and slightly apart.Place one foot flat on the floor and the other foot on top of the ball.Rest your arms by your sides with palms facing down.
Movement
A. Lift your pelvis off the floor into a bridge position.
B. Press into the ball and float the grounded leg up into a tabletop position.
C. Lower the lifted leg back down, then slowly roll your spine back to the floor.
Repeat for 5–10 repetitions, then switch sides.
Technique & Key Points:
- Keep your pelvis level as you lift and lower.
- Engage your glutes and core to support the movement.
- Move slowly and with control, avoiding any sinking or shifting through the hips.
Pilates Ball Exercise #6: Double Leg Extension
The double leg extension on the Pilates ball challenges your core control and coordination while stabilizing the pelvis through dynamic movement.
Starting Position: Lie on your back with one foot placed on the ball and the other leg lifted, bent in a tabletop position.Rest your arms by your sides with palms facing down.
Movement: Extend both legs at the same time: roll the ball away from your body to straighten one leg, while extending the opposite leg upward toward you.Then bend both knees to return to the starting position.Repeat for 5–10 repetitions, then switch sides.
Technique & Key Points:
- Keep your pelvis stable and your spine in a neutral position throughout the movement.
- Avoid pressing your lower back into the floor.
- Engage your core to control the motion and support the pelvis.
- Aim to fully lengthen both legs as you extend.
- Breath Cue: Exhale as you extend and split the legs. Inhale as you return to the starting position.
Pilates Ball Exercise #7: Roll Up
The roll up with the Pilates ball improves spinal mobility, strengthens the core, and connects breath with smooth, controlled movement.
Starting Position: Lie on your back with your knees bent and together, and your feet resting on the ball.Extend your arms overhead in line with your ears.
Movement: Lift your arms toward the ceiling as you begin to extend your legs, rolling the ball away.Continue lifting your head and chest to roll up to a seated position, reaching forward over your legs.Slowly roll back down with control, bending your knees to return to the starting position.Repeat for 5–10 repetitions.
Technique & Key Points:
- Coordinate the leg extension with the upper body as you roll up.
- Move through the spine one segment at a time, maintaining control throughout.
- Keep the movement smooth and continuous, avoiding momentum.
- Breath Cue: Inhale to prepare. Exhale as you roll up to sitting. Inhale at the top. Exhale as you roll back down.
Modification: If rolling up feels challenging, place a rolled towel under your lower back for support.
Progression: For a more advanced variation, keep your legs extended throughout the movement and maintain your arms in line with your ears as you roll up.
Pilates Ball Exercise #8: Reverse Plank
The reverse plank on the Pilates ball strengthens the posterior chain while opening the chest and improving overall stability.
Starting Position: Sit upright with your legs extended forward and your feet resting on the ball.Place your hands on the floor beside your hips, fingers pointing forward or slightly outward.
Movement: Press your legs gently into the ball as you lift your pelvis up into a reverse plank position.Open through the chest and create a long line from shoulders to heels.Slowly lower your pelvis back down with control.Repeat for 5–8 repetitions.
Technique & Key Points:
- Engage your glutes and core as you lift, gently tucking the pelvis to avoid arching the lower back.
- Press your shoulders down and away from your ears while opening the chest.
- Keep the movement steady and controlled throughout.
- Breath Cue: Inhale as you lift into the reverse plank. Exhale as you lower back down.
Progression: For an added challenge, keep one foot on the ball and the other foot on the floor.Lift into the reverse plank, then extend the grounded leg up toward the ceiling. Lower the leg back down, then return the pelvis to the floor.Repeat and switch sides.

Pilates Ball Exercise #9A: Chest Lift
The chest lift on the Pilates ball strengthens the abdominals while improving spinal mobility and control.
Starting Position: Lie back with the ball positioned under your mid-back.Keep your knees bent hip-width apart and feet flat on the floor.Interlace your fingers behind your head, supporting it gently.
Movement: Inhale as you extend your spine back over the ball, opening through the chest.Exhale as you flex your spine, lifting your head and shoulders forward into a chest lift.Repeat for 8–10 repetitions.
Technique & Key Points:
- Keep your head aligned with your spine throughout both extension and flexion.
- Avoid pulling on your neck — support the head lightly and lift through the torso.
- Move with control, focusing on the abdominal connection.
Progression: To increase the challenge, add a knee fold. As you lift into the chest lift, bring one leg up into tabletop. Lower the leg as you extend back over the ball. Alternate sides with each repetition.
Pilates Ball Exercise #9B: Chest Lift + Twist
The chest lift with rotation adds an oblique challenge, improving core strength, coordination, and rotational control.
Starting Position: Lie with the ball under your mid-back, knees bent hip-width apart.Keep one foot on the floor and the other leg lifted in a tabletop position.Interlace your fingers behind your head.
Movement: Inhale to prepare at center. Exhale as you lift and rotate your chest toward the leg in tabletop, extending that leg forward to about a 45-degree angle. Inhale to return to center as you bend the knee back to the starting position. Repeat, alternating sides.
Technique & Key Points:
- Keep your hips stable and facing forward - avoid rotating through the pelvis.
- Lift and rotate through the upper body, slightly coming off the ball.
- Maintain control and length through the movement.
Pilates Ball Exercise #10: Side Lift
The side lift on the Pilates ball targets the obliques while improving lateral strength, control, and balance.
Starting Position: Lie on your side with your bottom hand resting on the ball.Place your top hand either in front of your chest for support, or on your hip for an added stability challenge.Extend your legs straight and stack them one on top of the other, hovering slightly off the ground.
Movement: Gently press into the ball as you lift your head and chest into a side bend.Roll the ball slightly toward you at the top of the movement.Then roll it away as you lower your body back down with control.Repeat for 5–10 repetitions, then switch sides.
Technique & Key Points:
- Engage your abdominals before initiating the lift to support the movement.
- Keep your legs lifted and stacked throughout the exercise.
- Avoid collapsing into the shoulder - stay active and supported through the arm.
- Move slowly, focusing on control and length through the side body.
- Breath Cue: Exhale as you lift into the side bend. Inhale as you return to the starting position.
Modification: For beginners, keep your legs resting on the floor to provide more stability.
Final Thoughts on Pilates Ball Exercises
The beauty of pilates ball exercises lies in their simplicity.
This small tool adds depth, control, and precision to your movement — helping you connect more deeply to your body while building strength from the inside out.
Whether you’re practicing at home, teaching a class, or traveling, the Pilates ball is one of the most effective (and underrated) tools you can use.
Ready to try these exercises?
Grab your ball here!
Still have questions?
If you have any questions about the workouts, guides, or anything on the site, feel free to get in touch.